
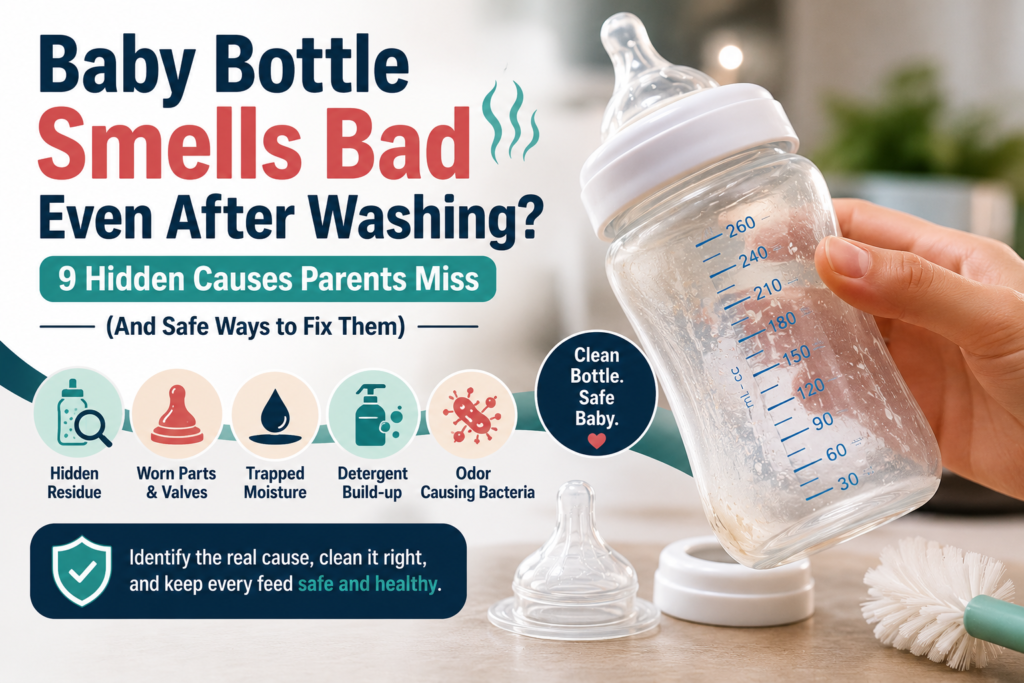
I still remember the first time I noticed a strange smell coming from one of my baby’s bottles. It had just been washed with hot, soapy water, rinsed thoroughly, and left to dry overnight. Everything looked perfectly clean, yet as soon as I opened the bottle to prepare the next feed, there it was—a sour smell that instantly made me question whether the bottle was really clean.
My first reaction was to wash it again.
Then I tried sterilizing it.
The smell faded slightly, but it came back after the next feed.
Like many parents, I assumed that a clean-looking bottle had to be a clean bottle. I later discovered that appearance can be misleading. A baby bottle can look spotless while tiny amounts of milk residue, trapped moisture, damaged silicone, or worn parts continue to hold unpleasant odours.
What surprised me most was that almost every article I found online suggested the same quick solutions vinegar, baking soda, or another round of sterilizing. Very few explained why the smell keeps coming back or how to identify the real cause before deciding whether the bottle can still be used safely.
That’s exactly why I wrote this guide.
Instead of giving you another list of cleaning hacks, I’ll help you understand what different smells actually mean, where they usually come from, and how to fix the problem without damaging your baby’s feeding equipment.
Whether you use Philips Avent, Dr. Brown’s, Tommee Tippee, Comotomo, MAM, or another trusted brand, the same principles apply.
By the end of this article, you’ll know how to tell the difference between a bottle that simply needs a better cleaning routine and one that should be replaced altogether.
Quick Answer
If your baby’s bottle still smells bad after washing, the smell is usually caused by residue, trapped moisture, worn silicone parts, detergent build-up, or hidden areas that aren’t being cleaned properly not because the bottle itself is “dirty.”
In many cases, the bottle body isn’t the real problem.
The smell often comes from:
- The bottle nipple
- Anti-colic valves
- Bottle collars
- Silicone seals
- Moisture trapped after washing
The first step isn’t buying a new bottle it’s identifying where the smell is coming from.
Why a Clean Baby Bottle Can Still Smell
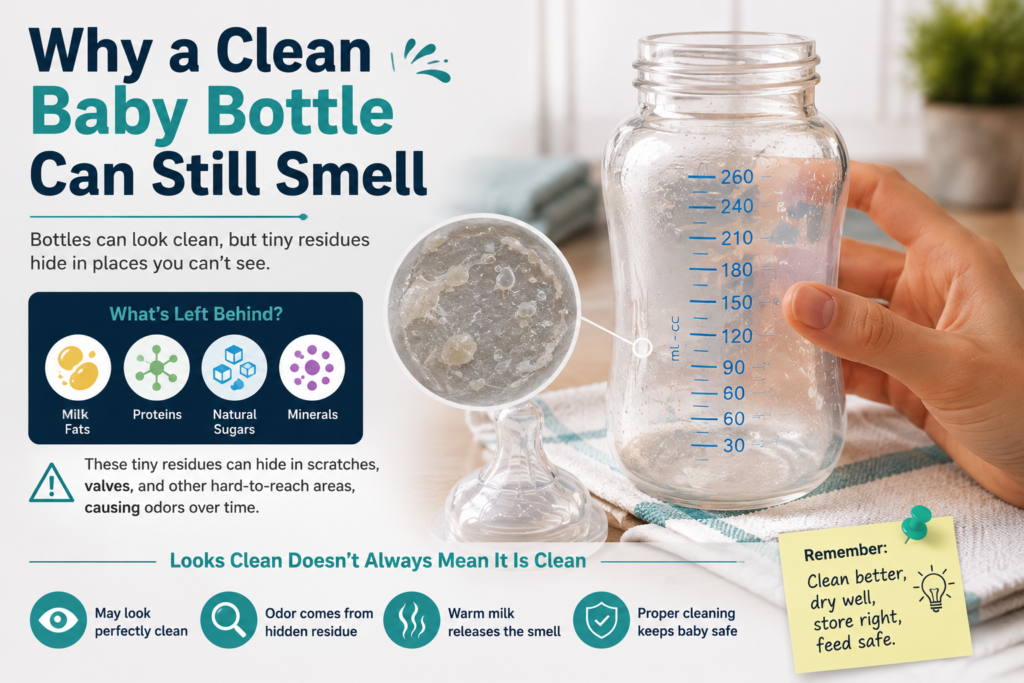
One of the biggest misconceptions I see among new parents is believing that if a bottle looks clean, it must also be free from odours and residue.
Unfortunately, that’s not always true.
Milk is surprisingly complex.
Whether you’re feeding breast milk or infant formula, every feed leaves behind tiny amounts of:
- Milk fat
- Proteins
- Natural sugars
- Minerals
Most of these wash away easily.
Some don’t.
Over time, these tiny residues can settle into places you rarely inspect, such as under bottle collars, inside anti-colic vents, around silicone valves, or inside microscopic scratches in older plastic bottles.
Warm temperatures, moisture, and enclosed spaces make these areas ideal for lingering odours.
That’s why a bottle may smell perfectly fine while it’s drying but develop an unpleasant odour as soon as you close the cap.
The smell isn’t always coming from the milk you just prepared.
Sometimes it’s coming from yesterday’s residue hidden in a place you never knew existed.
Before You Try to Fix the Smell, Identify It
One thing I rarely see discussed is that not every bottle smell has the same cause.
Parents often search:
“How do I remove the smell from my baby’s bottle?”
A better question is:
“What type of smell am I actually dealing with?”
Different smells usually point to different problems.
| What the Bottle Smells Like | Possible Cause |
| Sour milk | Milk residue trapped in hidden areas |
| Musty or damp | Moisture trapped during storage |
| Strong plastic smell | Heat exposure or ageing plastic |
| Soapy smell | Detergent residue not fully rinsed away |
| Chemical smell | Unsuitable cleaning products or material degradation |
| Burnt smell | Bottle exposed to excessive heat |
| Sweet but unpleasant smell | Old formula residue inside valves or nipples |
Identifying the smell first often saves time because you’re solving the real problem instead of trying random cleaning methods.
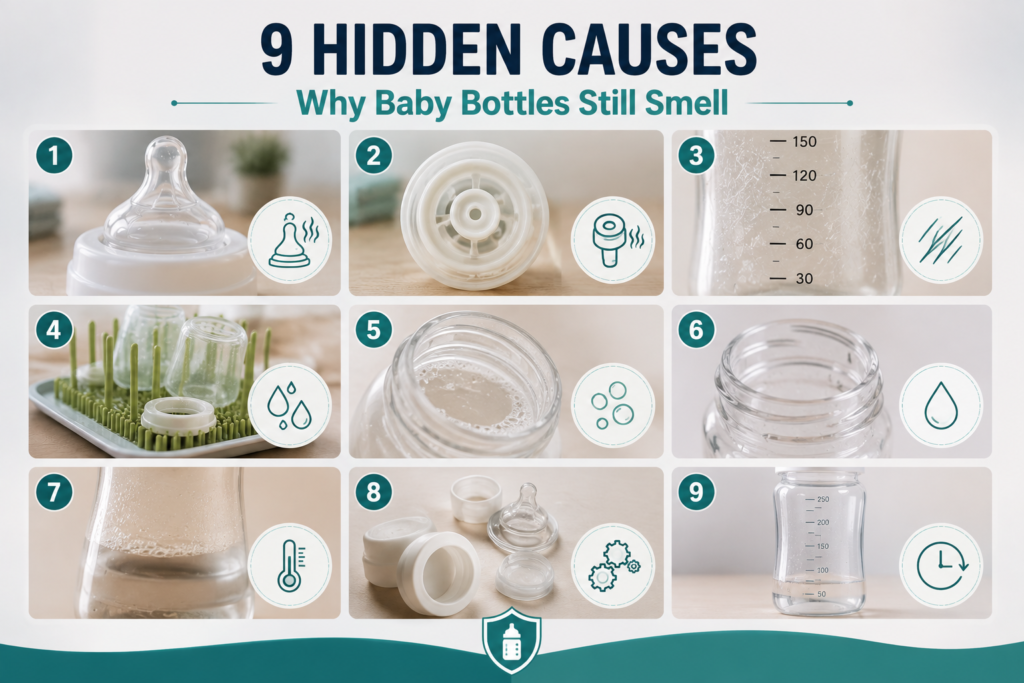
Hidden Cause 1: The Bottle Nipple Is Holding the Smell
If I had to choose the single part most parents overlook, it would be the nipple.
Silicone nipples experience more stress than any other bottle component.
Every day they are:
- Filled with warm milk
- Compressed during feeding
- Sterilized repeatedly
- Exposed to saliva
- Washed several times
Over time, silicone can absorb odours more easily than many parents expect.
A nipple may still look perfectly normal while holding onto the smell of old formula or breast milk.
How to Check
Before washing the entire bottle again, remove the nipple and smell it separately.
If the nipple smells stronger than the bottle itself, you’ve probably found the source.
What to Do
- Clean the nipple thoroughly according to the manufacturer’s instructions.
- Check for tears, stickiness, or changes in texture.
- Replace damaged nipples promptly rather than continuing to use them.
Many parents replace bottles while forgetting that nipples are designed to wear out much sooner.
Hidden Cause 2: Milk Is Trapped Inside the Anti-Colic System
Anti-colic bottles are excellent for reducing swallowed air, but they also introduce one challenge.
More parts mean more places where milk can hide.
Depending on the design, an anti-colic bottle may include:
- Air vents
- Valves
- Membranes
- Vent tubes
- Silicone discs
If even a small amount of milk remains inside these components after feeding, it can dry before the next wash.
The bottle may appear perfectly clean from the outside while hidden residue continues producing unpleasant smells.
Signs This Is the Problem
- The smell disappears when the bottle is taken apart.
- One particular valve smells much stronger than the bottle.
- The odour returns quickly after each feed.
Better Cleaning Habit
Instead of washing bottles while they’re assembled, separate every removable part before cleaning.
Pay extra attention to narrow channels where milk can collect.
A dedicated bottle brush and smaller cleaning brushes designed for bottle vents can make this much easier.
Hidden Cause 3: Tiny Scratches Are Holding Old Milk Residue
This is one of the least discussed reasons bottles continue smelling even after careful washing.
Plastic bottles naturally develop microscopic scratches through everyday use.
They may come from:
- Rough bottle brushes
- Abrasive kitchen sponges
- Repeated dishwasher cycles
- Everyday wear
Although these scratches are difficult to see, they create tiny grooves where milk proteins can remain after washing.
Each new feed adds another thin layer.
Eventually, the smell becomes noticeable even though the bottle appears perfectly clean.
How to Inspect
Hold the bottle under bright natural light.
Slowly rotate it while looking across the surface rather than directly at it.
Fine scratches often become much easier to spot from an angle.
If the bottle has become heavily scratched, replacing it is usually a safer long-term option than trying stronger cleaning methods.
Hidden Cause 4: Your Drying Rack Could Be Recontaminating Clean Bottles
Most parents focus on washing bottles properly, but very few think about where bottles dry.
After cleaning, bottles are usually placed upside down on a drying rack. If that rack isn’t cleaned regularly, leftover water, soap residue, food particles, or moisture underneath can become a source of unpleasant odours.
A bottle that was perfectly clean after washing can pick up a musty smell simply because it dried on a dirty surface.
This is especially common when:
- The drying rack sits beside the kitchen sink.
- Water collects underneath the tray.
- The rack is never washed itself.
- Kitchen grease or food splashes reach the bottles.
How to Check
Smell the drying rack instead of the bottle.
If the rack has a damp or sour odour, it may be transferring that smell back to your baby’s feeding equipment.
Better Practice
- Wash the drying rack at least once a week.
- Empty standing water daily.
- Allow good airflow around drying bottles.
- Store bottles only after every part is completely dry.
Hidden Cause 5: Detergent Residue Is Staying Inside the Bottle
Sometimes the smell isn’t milk at all.
It’s soap.
Many scented washing-up liquids leave behind a light fragrance that adults barely notice but becomes obvious once warm milk is added to the bottle.
Parents often mistake this for a plastic smell.
In reality, it may simply be detergent that hasn’t rinsed away completely.
Signs
- The bottle smells “clean” when empty.
- The smell becomes stronger after warm milk is added.
- Every bottle washed in the same sink has the same scent.
What To Do
- Use a fragrance-free washing liquid whenever possible.
- Rinse bottles thoroughly with clean running water.
- Pay extra attention to collars, nipples, and valves where soap can collect.
Hidden Cause 6: Moisture Is Trapped Inside the Bottle
A bottle can look dry while tiny drops of water remain hidden inside the collar, nipple, or anti-colic valve.
Once the bottle is assembled and stored, that trapped moisture creates the perfect environment for stale odours.
I’ve noticed this happens most often when parents assemble bottles immediately after washing because they want them ready for the next feed.
Better Practice
Allow every component to air-dry separately before assembling the bottle.
It takes a little longer, but it greatly reduces trapped moisture.
Hidden Cause 7: Heat Has Changed the Bottle Material
Heat is essential when sanitizing bottles correctly, but every bottle material responds differently over time.
Repeated exposure to:
- boiling water,
- steam sterilizers,
- high dishwasher temperatures,
- or microwave sterilizers (when approved by the manufacturer),
can gradually affect plastic and silicone components.
You may notice:
- a stronger plastic smell,
- cloudy surfaces,
- faded measurement markings,
- or silicone that feels softer than before.
This doesn’t automatically mean the bottle is unsafe, but it does mean it’s worth inspecting carefully and following the manufacturer’s care instructions.
Better Practice
Always use the cleaning and sanitizing method recommended for your specific bottle.
Not every bottle is designed for every type of heat treatment.
Hidden Cause 8: The Bottle Doesn’t Need Replacing Only One Part Does
One mistake I see frequently is replacing the entire bottle when only one component has worn out.
Bottle nipples, valves, and silicone seals generally wear faster than the bottle body.
If one of these parts is holding odours or no longer functions properly, replacing it may solve the problem without replacing the complete bottle.
Replace Individual Parts When
- the bottle body is still in excellent condition,
- only the nipple smells,
- the valve has lost its shape,
- the seal has become loose,
- or one component is visibly damaged.
Replace the Entire Bottle When
- the bottle is cracked,
- glass is chipped,
- plastic has deep scratches,
- the neck is damaged,
- measurement lines have become difficult to read,
- or the bottle continues to smell even after thorough cleaning and replacing worn parts.
Hidden Cause 9: The Bottle Is Simply Reaching the End of Its Useful Life
Even with excellent care, no feeding bottle lasts forever.
Daily washing, repeated handling, temperature changes, and normal wear gradually affect every bottle.
Sometimes parents spend weeks trying different cleaning methods when the simplest solution is replacing an old bottle.
If you’ve:
- cleaned every component,
- replaced the nipple,
- checked the valves,
- inspected for scratches,
- changed detergents,
- and the smell still returns,
the bottle has probably reached the end of its useful life.
Replacing it is often the safest and most practical decision.
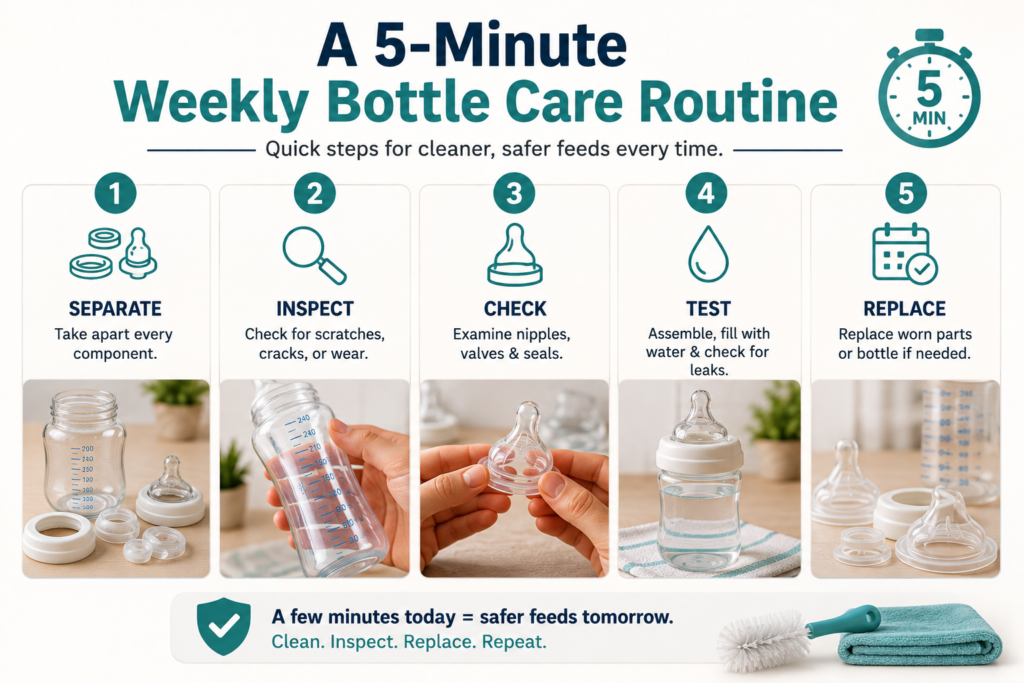
A 5-Minute Weekly Bottle Care Routine
One habit that has helped me avoid most bottle problems is setting aside five minutes once a week to inspect every feeding bottle.
Step 1
Separate every component.
Step 2
Inspect the bottle under bright light.
Look for:
- scratches,
- cracks,
- cloudy plastic,
- chipped glass,
- faded measurement markings.
Step 3
Stretch each nipple gently.
Replace it if you notice:
- tears,
- stickiness,
- unusual softness,
- enlarged feeding holes.
Step 4
Check valves and anti-colic parts.
Make sure they:
- return to their original shape,
- fit correctly,
- show no signs of damage.
Step 5
Assemble the bottle, fill it with water, and turn it upside down.
If it leaks, inspect the collar and sealing parts before the next feed.
This quick routine takes only a few minutes and can help you spot small problems before they affect feeding.
Is It Safe to Use Vinegar or Baking Soda?
Many online articles recommend vinegar or baking soda to remove stubborn odours.
These methods may help remove mineral deposits or lingering smells from some bottles, provided they are compatible with the manufacturer’s care instructions.
However, they are not magic solutions.
If an odour is caused by:
- damaged silicone,
- deep scratches,
- worn bottle parts,
- trapped milk inside valves,
no household cleaning method will permanently fix the problem.
Always rinse bottles thoroughly after any approved cleaning treatment, and avoid experimenting with harsh chemicals that are not intended for infant feeding equipment.
Final Thoughts
A bad smell doesn’t always mean your baby’s bottle is unsafe but it does mean something deserves your attention.
Instead of masking the odour or repeatedly sterilizing the bottle, take a few minutes to identify where the smell is coming from. In many cases, replacing a worn nipple, cleaning hidden anti-colic parts more carefully, or improving the drying routine solves the problem.
If the bottle has deep scratches, persistent odours, cracks, warped parts, or unreadable measurement markings, replacing it is the safer choice.
Good bottle care isn’t about making bottles last forever. It’s about making every feed as safe, clean, and reliable as possible.
Frequently Asked Questions
Why does my baby’s bottle smell like sour milk even after washing?
The smell is usually caused by milk residue trapped inside bottle nipples, anti-colic valves, collars, or microscopic scratches that aren’t fully cleaned.
Why does the bottle smell only after warm milk is added?
Warm milk can release odours trapped inside silicone parts, detergent residue, or older plastic materials that are less noticeable when the bottle is empty.
Is it safe to keep using a bottle that smells bad?
No.
A persistent smell should never be ignored.
Inspect the bottle carefully, clean every component according to the manufacturer’s instructions, replace worn parts if necessary, and replace the entire bottle if the odour cannot be eliminated or the bottle shows signs of damage.
Which part usually smells first?
In my experience, the bottle nipple and anti-colic valve are usually the first components to retain odours because they come into direct contact with milk during every feed and experience the most wear.
How can I prevent bottle odours in the future?
- Rinse bottles soon after feeding.
- Separate every component before washing.
- Allow all parts to dry completely.
- Clean the drying rack regularly.
- Replace worn nipples and valves promptly.
- Inspect bottles weekly instead of waiting for obvious damage.